前提
- 1 首先你要有一台服务器(拥有管理权限,ecs 什么的都可以,但是那种一个空间,放网站文件的不行)
- 2 你的这台服务器要能够上 Google
- 3 本文针对的是 Linux 服务器
一些介绍
我觉得这个说的比较清楚
反向代理为何叫反向代理? – 回答作者: zhijun liu http://zhihu.com/question/24723688/answer/128105528
而你的这台服务器,要扮演的就是这样的角色
下面是原文:
扯两句
wen.lu 一路走到现在, 离不开大家的支持!
很多朋友通过各种方式问过我: “ 你丫怎么不开源啊…”
先向那些朋友道歉啊, 其实不是我不想开源, 只是之前的版本配置实在太复杂. nginx 三方扩展用了一大堆, 外加 lua, 以及突破千行的配置工程, 这么拙劣的技艺, 实在不好意思拿出来分享
遂决定写一个扩展, 让 google 反代的配置和使用 wen.lu 一样简单.
- location / {
- google on;
- }
你没有看错, “一行配置, google 我有!”
现在 g2.wen.lu 就是由该扩展驱动
(当然,网站现在已经挂了)
依赖库
安装
以 ubuntu 14.04 为例 i386, x86_64 均适用
最简安装(我尝试的就是这个)
- #
- # 安装 gcc & git
- #
- apt-get install build-essential git gcc g++ make
- //CentOS 中使用 yum install build-essential git gcc g++ make
- #
- # 下载最新版源码
- # nginx 官网:
- # http://nginx.org/en/download.html
- #
- wget "http://nginx.org/download/nginx-1.7.8.tar.gz"
- #
- # 下载最新版 pcre
- # pcre 官网:
- # http://www.pcre.org/
- #
- wget "https://ftp.pcre.org/pub/pcre/pcre-8.40.tar.gz"
- #
- # 下载最新版 openssl
- # opessl 官网:
- # https://www.openssl.org/
- #
- wget "https://www.openssl.org/source/openssl-1.0.1j.tar.gz"
- #
- # 下载最新版 zlib
- # zlib 官网:
- # http://www.zlib.net/
- #
- wget "http://www.zlib.net/zlib-1.2.11.tar.gz"
- #
- # 下载本扩展
- #
- git clone https://github.com/cuber/ngx_http_google_filter_module
- #
- # 下载 substitutions 扩展
- #
- git clone https://github.com/yaoweibin/ngx_http_substitutions_filter_module
- #
- # 解压缩
- #
- tar xzvf nginx-1.7.8.tar.gz
- tar xzvf pcre-8.40.tar.gz
- tar xzvf openssl-1.0.1j.tar.gz
- tar xzvf zlib-1.2.11.tar.gz
- #
- # 进入 nginx 源码目录
- #
- cd nginx-1.7.8
- #
- # 设置编译选项
- #
- ./configure \
- --prefix=/opt/nginx-1.7.8 \
- --with-pcre=../pcre-8.40 \
- --with-openssl=../openssl-1.0.1j \
- --with-zlib=../zlib-1.2.11 \
- --with-http_ssl_module \
- --add-module=../ngx_http_google_filter_module \
- --add-module=../ngx_http_substitutions_filter_module
- #
- # 编译, 安装
- # 如果扩展有报错, 请发 issue 到
- # https://github.com/cuber/ngx_http_google_filter_module/issues
- #
- make
- sudo make install
- #
- # 启动, 安装过程到此结束
- #
- sudo /opt/nginx-1.7.8/sbin/nginx
- #
- # 配置修改后, 需要 reload nginx 来让配置生效,
- #
- sudo /opt/nginx-1.7.8/sbin/nginx -s reload
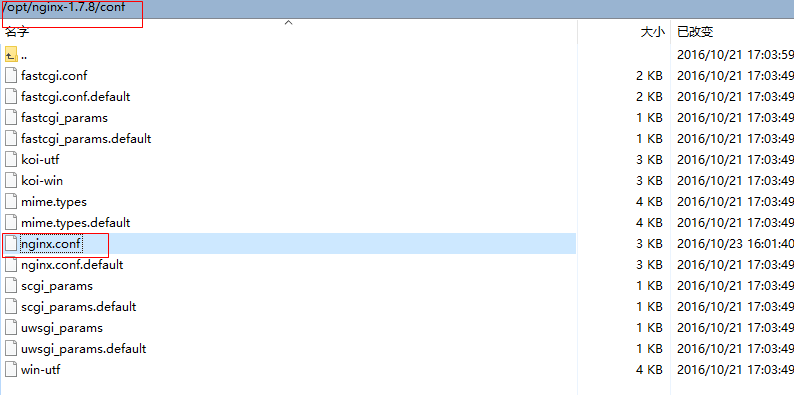
其实这个时候安装就完成了,但是你需要去配置 nginx,记得去 opt/nginx-xxxxx 下面,别在下载路径下费劲配置半天 (-为啥我要强调呢?啊哈哈
就是这个地方的这个文件
http 配置方式
- server {
- server_name < 你的域名>;
- listen 80;
- resolver 8.8.8.8;
- location / {
- google on;
- }
- }
https 配置方式
首先要制作证书
可以自己制作,也可以申请免费的
自己制作看这里自己给自己签发 SSL 证书
申请免费证书看这里 StartSSL 免费 ssl 证书申请指南
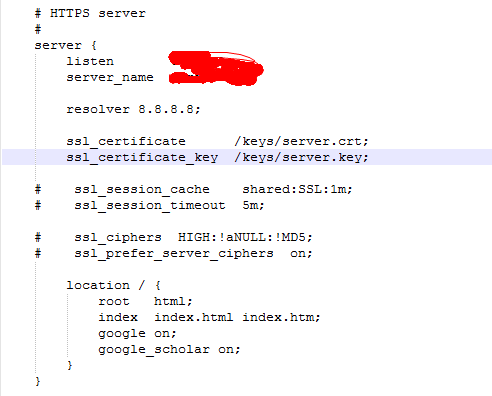
然后配置就好了
- server {
- server_name < 你的域名>;
- listen 443;
- ssl on;
- ssl_certificate < 你的证书>;
- ssl_certificate_key < 你的私钥>;
- resolver 8.8.8.8;
- location / {
- google on;
- }
- }

listen 那里是端口号 比如 65 啊就写 65
server_name 那里写域名 也就是你要访问的代理的地址,比如 xxx.com 或者 y.xxx.com
转载请注明:热爱改变生活.cn » (转)Nginx Google 代理模块 (ngx_http_google_filter_module) —反向代理 Google
本博客只要没有注明“转”,那么均为原创。 转载请注明链接:sumile.cn » (转)Nginx Google 代理模块 (ngx_http_google_filter_module) —反向代理 Google


